The Auto Assessment feature on Sight Reading Factory gives musicians the ability to record their sight reading and receive immediate feedback. This powerful tool transforms the music learning process by giving a detailed breakdown on pitch accuracy, timing, and intonation.
Note: Auto Assessment works the best on modern devices in Chrome, Edge, Firefox, or Safari.
In this tutorial on the Auto Assessment feature, we’ll walk you through:
- Generating music for Auto Assessment
- Recording the exercise
- Receiving your score
- Viewing the ‘Simple View’ of results on the music staff
- Viewing the ‘Detailed view’ of results on the piano roll
- FAQs
Generating music for Auto Assessment
If you are configuring an exercise from scratch...
- Select ‘Start Practicing’ from your dashboard
- Pick your instrument/voice type, level, time signature, and key signature. (continue to step 3)
If you are launching a recent or saved configuration or from a saved URL...
- Generate an exercise from your recent/saved configuration or URL (by default, these will always launch in Free Play mode)
- Select the hamburger menu icon on the left side of the top toolbar and select ‘Select Mode’. (continue to step 3)
- On the ‘Select Mode’ screen, select ‘Auto Assessment’
- On the ‘Performance Options’ screen, select if you would like the cursor, metronome track, or disappearing measures features enabled. We do recommend having the metronome track enabled for better timing.
- Select ‘Start’ to generate your exercise for assessment.
Recording the exercise
- Once your music appears on the screen, you can optionally change the tempo, listen to a metronome with your selected tempo, or listen to the tuner hint to help get your first pitch or help tune your instrument. (You can also click/tap any note to hear that pitch played)
- When you are ready to record the exercise for assessment, select the red microphone button on the left side of the top toolbar.
- After selecting the red microphone, you’ll see ‘Get ready’ with a progress bar and then some visual prep beats based on the time signature you have selected. After the ‘Get ready’ progress bar is filled, the visual prep beats will fire off with metronome clicks.
- After all the visual prep beats have fired off, you will start performing the exercise while SRF is recording you.
Receiving your score
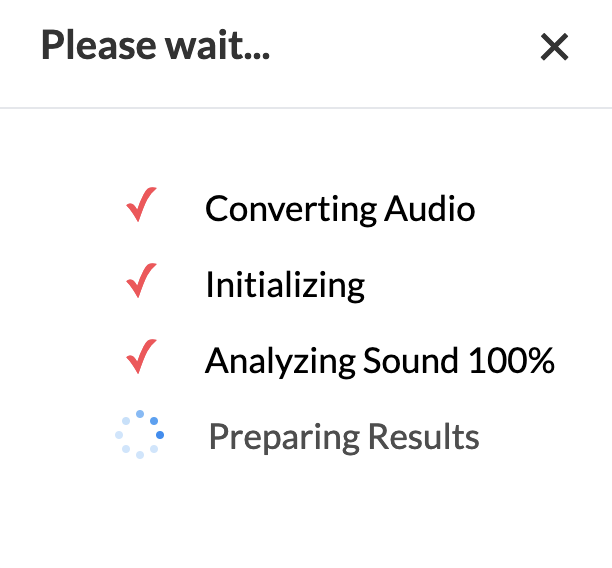
- When you are finished recording, you will see a dialog box showing you the progress of your recording being processed and analyzed. For most modern devices, this process will only take a few seconds. For older devices, the process can take longer.
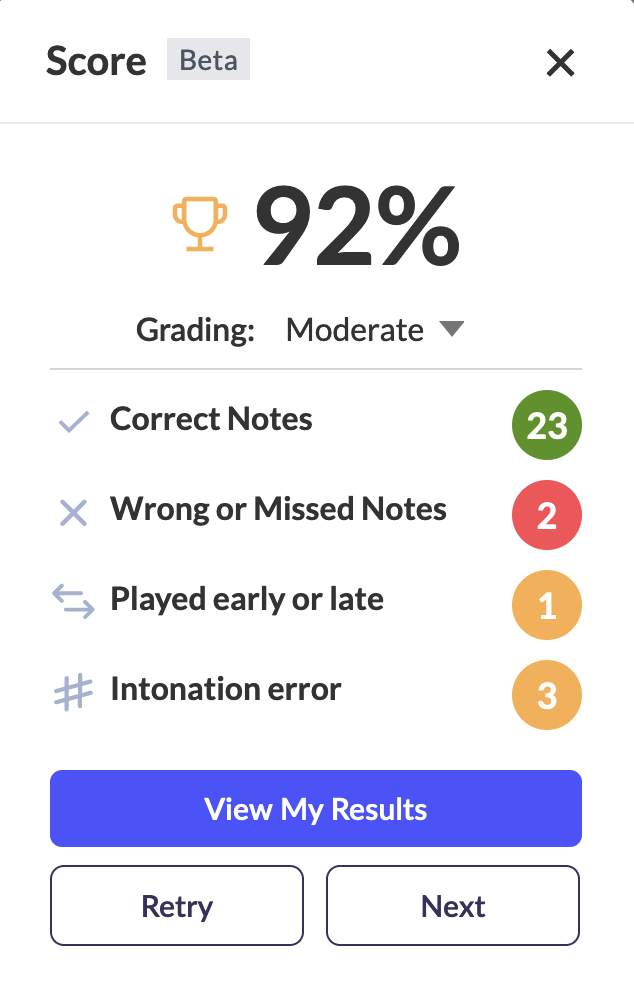
- After your recording has been analyzed, the score dialog will appear and show you your score and a breakdown of correct notes, wrong/missing notes, early/late errors, and intonation errors.
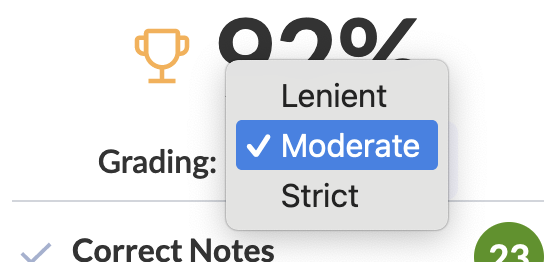
- In the dropdown next to “Grading:”, you can adjust the grading strictness to your preference: Strict, Moderate, or Lenient.
- If you want to see a detailed visual breakdown of your results, you can select the ‘View My Results’ button (more on this in the following sections)
- If you don’t want to view a visual breakdown of your results, you can retry that same exercise by selecting ‘Retry’ or generate a new exercise by selecting ‘Next’.
Viewing the ‘Simple View’ of results on the music staff
- Selecting ‘View My Results’ from the score dialog dismisses the dialog and allows you to see a visual breakdown of your results annotated on the music staff.
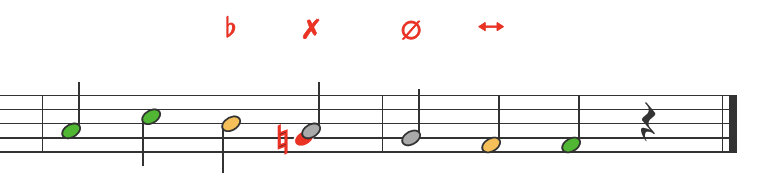
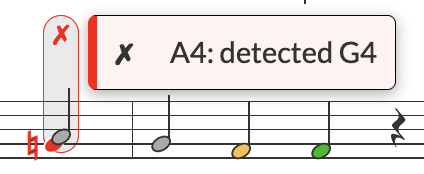
- On the music staff, correct notes will be green, wrong/missing notes will be red, and notes with intonation or early/late errors will be orange.
- For the notes that have errors/warnings, you will see symbols above the notes that describe the problem. The ✗ symbol indicates a wrong note, the ∅ symbol indicates a missing note, the ♯ and ♭ symbols indicate if notes were sharp or flat, and the ↔ symbol indicates an early or late error.
- Additionally, you can hover over or tap notes with errors/warnings for more information.
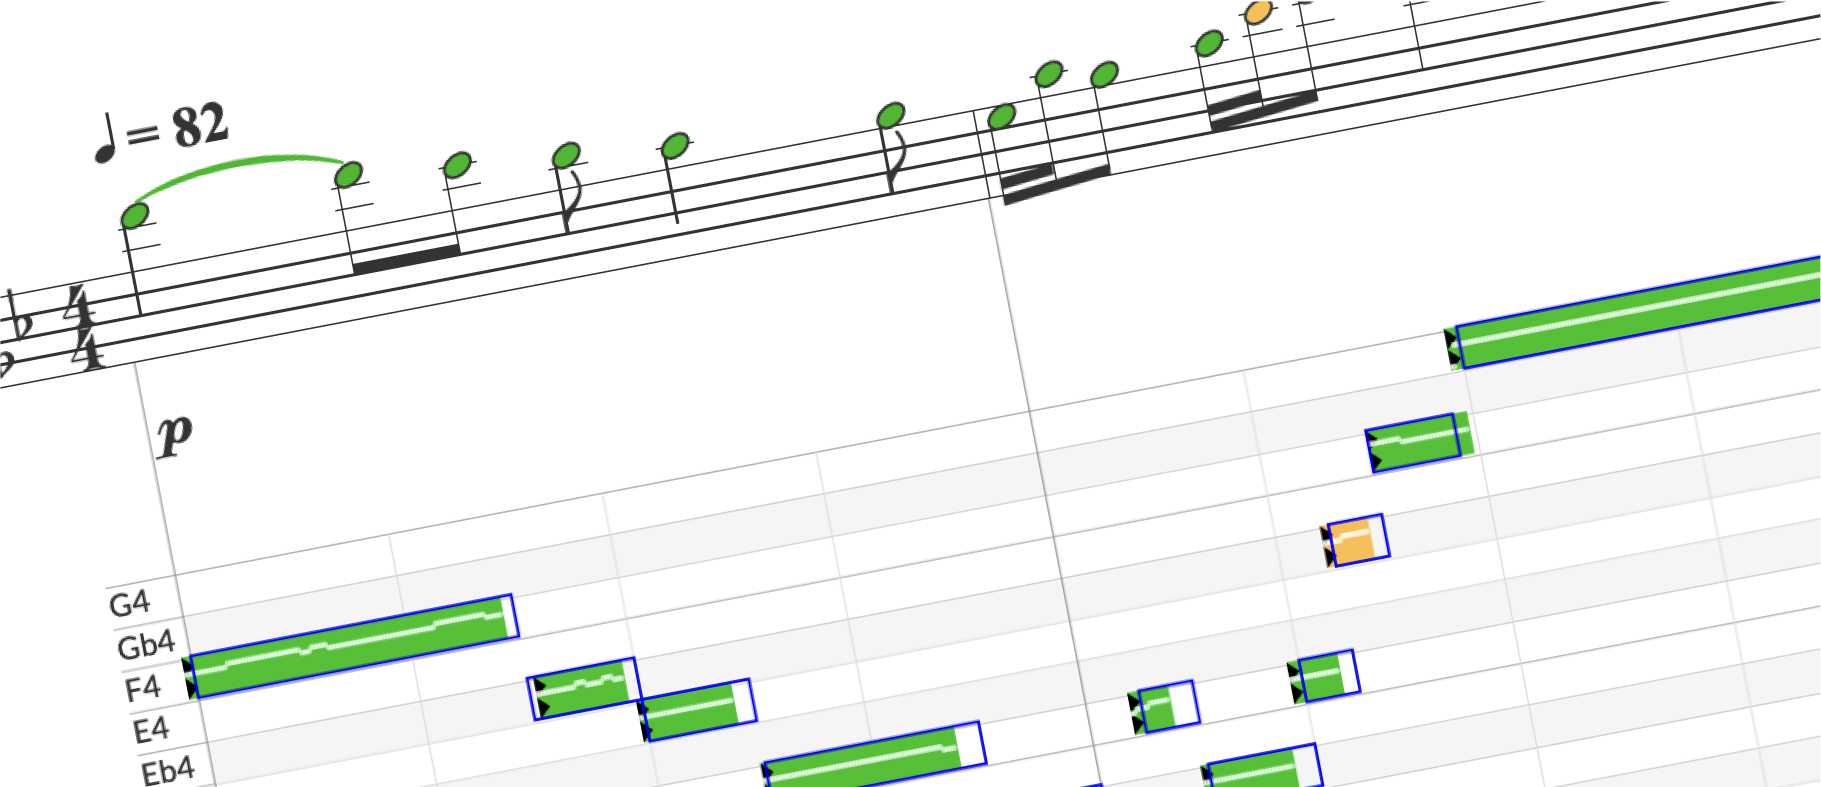
Viewing the ‘Detailed view’ of results on the piano roll
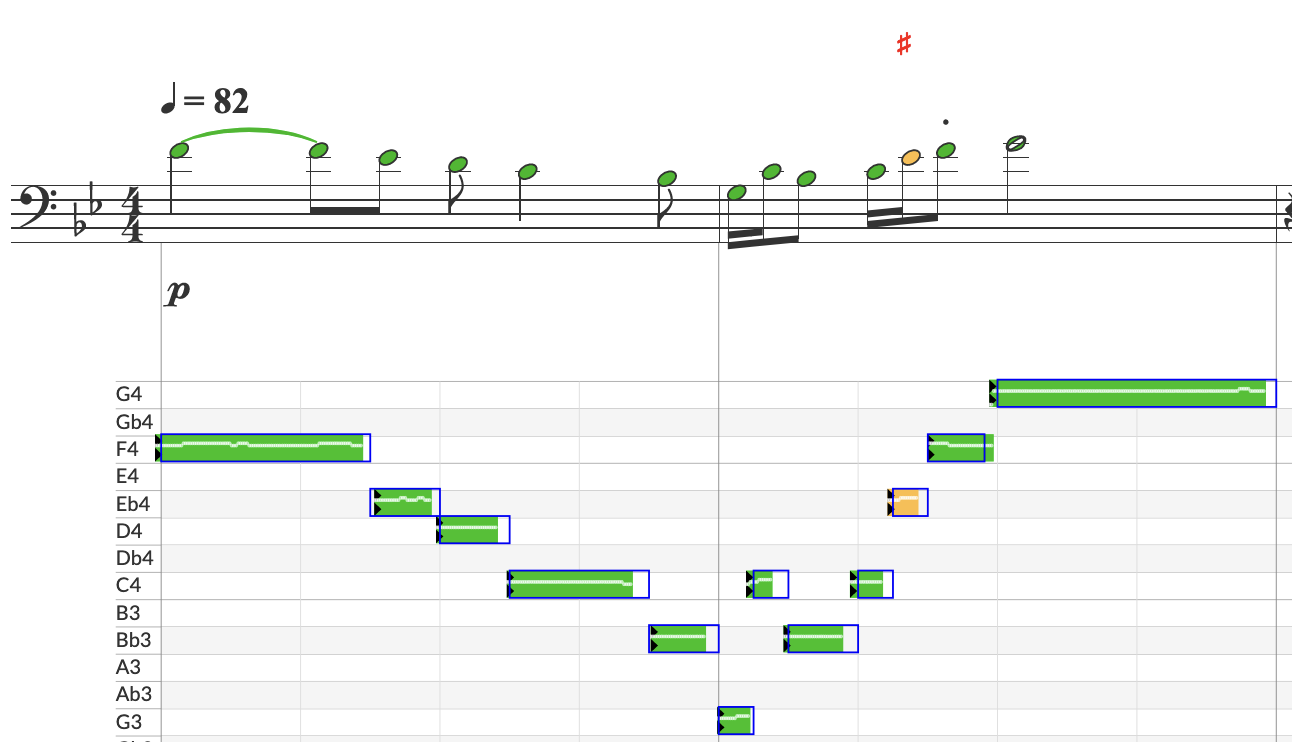
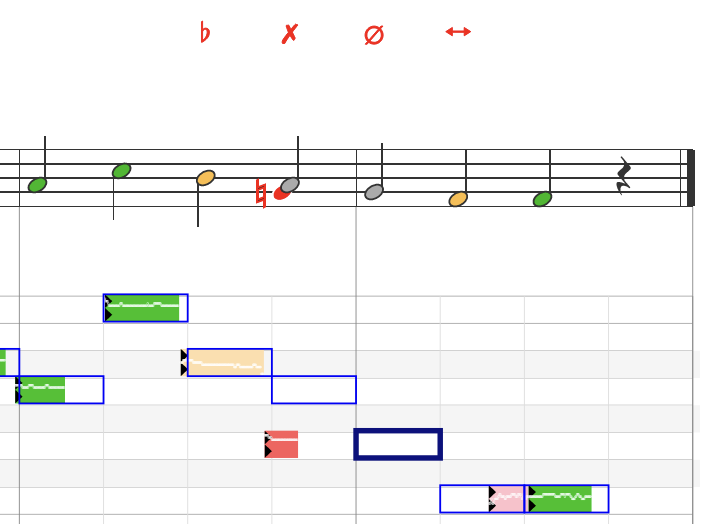
- For an even more detailed and exact view of your results, you can click/tap the magnifying glass icon (or use the "r" hotkey) to see a ‘piano roll’ view of what was detected. Clicking/tapping the magnifying glass icon (or using the "r" hotkey) serves as a way to cycle through the various views (simple view, detailed view, and no markup).
- The rows are stacked by half steps with the pitch names for the rows labeled on the far left. The columns are divided by beats and by measures.
- When in Piano Roll view, the measures and notes of the piano roll should vertically line up with the measures and notes of the actual music in the staff.
- In the piano roll, the rectangles with the blue outlines represent what pitches and duration was expected.
- The green, red, and orange filled rectangles represent the performed notes that were detected: green for correct notes, red for wrong notes, and orange for intonation or early/late errors. Rectangles with a bold outline and no fill represent missing notes.
- The two small black triangles at the beginning of the detected notes represent the onset of that note.
- The white horizontal line within the detected notes represents the intonation: if the line is centered vertically it is perfectly in tune, if the line is higher in the rectangle it means the pitch was sharp, and if the line is lower in the rectangle it means the pitch was flat. The intonation for a note is calculated based on the average intonation for the duration of the note. i.e. If someone is using vibrato that goes a little flat and sharp around the center of the pitch, the note will still be counted in tune.
FAQs
Q: Why is my score so low?
A: This could be for a number of reasons, however, the most two most important recommendations are to 1) listen to your recording with the synth playback by clicking the Play icon and 2) look at the detailed piano roll view of your results (see above for instructions on how to do that). Doing those two things could answer the question as to why the score is so low. Additionally, here are some other possibilities to consider:
Q: Can I stop and restart/retry an example before it is finished?
A: Yes. If you click/tap the square “Stop” button on the top toolbar, it will stop recording and ask if you want to retry. Select “Yes” to restart the assessment for that same exercise.
Q: Can I retake an exercise and try to get a better score?
A: Yes. After attempting an exercise, you can select 'Retry' from the score dialog or the microphone icon from the top toolbar to attempt the same exercise again.
Q: I’m a vocalist. How do I hear my opening pitch?
A: You can click/tap the tuning fork icon or click/tap the first note. If you cannot hear a pitch, make sure your device is not muted and the volume is turned up.
Q: How do I bring back the score dialog after I have dismissed it?
A: Selecting your score on the top toolbar will bring back the score dialog.